Category: WordPress

  • How to Migrate from Framer to WordPress Without Losing SEO (2026 Guide)

    Introduction

    Switching from Framer to WordPress is a smart move when your website grows beyond static content. If you’re running into limitations with CMS, SEO, or content structure in Framer, this guide will walk you through a smooth transition to WordPress. We’ll help you migrate your Framer site to WordPress without losing performance, rankings, or visual appeal.

    Why Migrate from Framer to WordPress?

    • Framer’s CMS is limited and unintuitive
    • No built-in support for internal linking or topic clusters
    • Poor plugin ecosystem and limited extensibility
    • Not scalable for blogging or content-heavy workflows

    Migration Goals: What to Preserve

    Before you begin, define what must remain intact:

    • Your site’s URL structure for SEO continuity
    • Meta tags, canonical URLs, and schema markup
    • Page layouts and brand consistency
    • Mobile responsiveness and load speed

    Pre-Migration Checklist

    To begin your Framer to WordPress migration, gather:

    • A WordPress installation with hosting set up
    • Full access to your Framer content and files
    • A list of current Framer URLs
    • SEO metadata (titles, descriptions)
    • Sitemap.xml from Framer
    • Screenshots or Figma files for reference

    Step-by-Step Framer to WordPress Migration Process

    Step 1: Export Your Content

    • Framer lacks export tools for CMS content
    • Manually copy content from each page and blog post
    • Download or screenshot visual elements
    • Organize all metadata in a spreadsheet

    Step 2: Set Up Your WordPress Environment

    • Choose an SEO-friendly and lightweight theme
    • Install essential plugins:
      • RankMath or Yoast (SEO)
      • Elementor or Gutenberg (page builder)
      • WP Rocket or LiteSpeed Cache (performance)
      • Redirection plugin (URL mapping)
    • Adjust permalinks to mirror Framer URLs

    Step 3: Recreate Layouts in WordPress

    • Use Elementor or native blocks to rebuild page structure
    • Focus on responsiveness and loading speed
    • Match key visual sections using Figma references or screenshots

    Step 4: Import and Format Content

    • Add pages and blog posts manually
    • Paste content and format using blocks or widgets
    • Assign categories and tags for structure
    • Set featured images and SEO metadata
    • Use internal links to establish clusters

    Step 5: Redirect Old URLs

    • Map old Framer URLs to their new WordPress paths
    • Use the Redirection plugin to apply 301 redirects
    • Validate each redirect to avoid broken links

    Step 6: Test Thoroughly Before Launch

    • Review site on desktop, tablet, and mobile
    • Use Google PageSpeed Insights and GTmetrix to optimize load times
    • Run schema tests using Google Rich Results tool
    • Check forms, navigation, and CTAs

    Step 7: Submit Site to Google

    • Update sitemap and submit via Google Search Console
    • Use the URL Inspection tool to reindex important pages
    • Monitor traffic and crawl reports after launch
    • Connect Google Analytics for real-time tracking

    SEO Considerations During Migration

    Preserving your search performance is critical:

    • Match meta titles, H1s, and descriptions from Framer
    • Maintain clean and readable URLs
    • Set up Open Graph and Twitter Card data
    • Use internal linking plugins like Link Whisper to strengthen structure
    • Keep your sitemap and robots.txt accurate

    Design Tips for Framer to WordPress Migration

    Migrating from a visually dynamic Framer site?

    • Use lightweight page builders to match layouts
    • Keep design elements modular for future updates
    • Optimize all media (SVGs, images) for faster load times

    Example: Startup Migrates from Framer to WordPress

    A SaaS startup initially used Framer for a one-pager. As they started content marketing and SEO, they hit Framer’s limits.

    After switching to WordPress:

    • Blog added 25+ posts in 3 months
    • Organic traffic grew 4x
    • Internal linking reduced bounce rate by 30%
    • The marketing team managed content without developers

    Migration Timeline (Estimated)

    Task Time Estimate
    Content Extraction 1–2 hours
    WordPress Setup 1 hour
    Layout Rebuilding 2–4 hours
    Content Import 1–2 hours
    Redirect Setup 1 hour
    Final Testing 1 hour

    Most small Framer sites can be migrated in one working day.

    Common Pitfalls to Avoid

    • Skipping redirects → SEO ranking drop
    • Missing or duplicate metadata → poor search appearance
    • Choosing bloated themes → slow performance
    • Forgetting schema validation
    • Allowing Google to index staging sites

    Final Thoughts on Framer to WordPress Migration

    Migrating from Framer to WordPress gives you more than SEO—it unlocks flexibility, content control, plugin support, and long-term scalability. If your business is ready to grow, WordPress can support it.

    If you need help handling the move, our WordPress development team specializes in frictionless Framer to WordPress migrations. We’ll preserve your site structure, improve performance, and ensure zero downtime.

    You can also read our WordPress SaaS best practices guide for next steps after migration.

    Want someone to handle the migration for you?

    The steps above work well if you’re comfortable with both platforms. If you’d rather not touch redirects, database exports, or DNS settings yourself – we do this regularly. We’ll migrate your Framer site to WordPress with no content loss and no ranking drop.

    → Get a free migration quote

  • Framer vs WordPress: Which One Should You Choose for Your Website?

    Introduction

    Choosing between Framer vs WordPress can be tricky. Both tools help you build and manage websites, but they differ greatly in approach, flexibility, and scalability. This comparison breaks down the key differences so you can pick the right platform for your goals.

    Key Differences Between Framer and WordPress

    1. Approach to Website Building

      • Framer: Visual-first builder with a no-code interface. Great for designers and rapid prototyping.
      • WordPress: CMS-first. You can use page builders (like Elementor) or code directly.

    2. Hosting and Performance

      • Framer: Built-in hosting on a fast CDN. No server management needed.
      • WordPress: Self-hosted or managed hosting. Performance depends on your hosting provider and setup.

    3. SEO Capabilities

      • WordPress:
          • Strong SEO plugins (Yoast, RankMath)
          • Full control over meta tags, schema, URLs
          • Easy internal linking and cluster creation
      • Framer:
          • Basic SEO support
          • Requires manual configuration for CMS
          • Lacks strong internal linking tools

    4. CMS Features

      • WordPress: Full-fledged CMS. Supports blogs, custom post types, user roles, taxonomies, and media libraries.
      • Framer: Basic CMS. Requires configuration to support collections and content. Not user-friendly for non-technical users.

    5. Extensibility

      • WordPress:
          • 55,000+ plugins available
          • Plugin ecosystem supports everything from forms to eCommerce to security
      • Framer:
          • Limited plugin/integration options
          • Requires custom code for advanced features

    Use Case Scenarios

    Use WordPress If:

      • You need a blog, content-heavy site, or marketing funnel
      • You want full control over SEO and integrations
      • You plan to scale or build out complex features

    Use Framer If:

      • You’re a designer building a personal portfolio
      • You need a single-page site or landing page quickly
      • You don’t want to manage hosting or servers

    Cost Comparison

    Feature Framer WordPress
    Basic Plan $5–$10/month Hosting ~$3–$15/month
    Design/Builder Included Free or premium themes
    CMS Requires setup Full CMS included
    Plugins Very limited Thousands available
    Scalability Low High

    Pros and Cons

    WordPress Pros

      • Mature ecosystem
      • Complete CMS
      • Flexible hosting
      • Plugin network enables rapid development
      • Easy internal linking and SEO structure

    WordPress Cons

      • Learning curve for beginners
      • Requires updates and security management

    Framer Pros

      • Beautiful designs out of the box
      • No-code experience
      • Hosting included

    Framer Cons

      • Weak CMS with limited ease of use
      • Limited scalability
      • Poor internal linking and topic clusters
      • Limited integrations and plugin support

    Framer vs WordPress for SEO

    If SEO is your focus, WordPress is the better choice.

      • Access to plugins like RankMath for schema, redirects, and image optimization
      • Clean URL structures, canonical controls, and meta control
      • Easy internal linking and topic cluster structure

    Framer supports basic SEO metadata but lacks advanced control or automation tools. Internal linking and structured content grouping require manual effort and workarounds.

    Performance and Page Speed

      • Framer: Fast due to CDN-based delivery. Pages load quickly by default.
      • WordPress: Depends on hosting and theme/plugins used. Can match or beat Framer with optimization.

    Use tools like Google PageSpeed Insights to compare real data.

    Final Verdict

    Criteria Best Option
    SEO WordPress
    CMS Power WordPress
    Design/Prototyping Framer
    Ease of Use Framer
    Extensibility WordPress

    If you’re a marketer, content creator, or growing startup, choose WordPress. If you’re a designer building a portfolio or want visual control quickly, Framer works well.

    Made your decision? Here’s what to do next.

    If WordPress is the right call for your site – or if you’re not sure yet – we’re happy to talk it through. We’ve built 100+ WordPress sites and migrated dozens from Framer, Webflow, and Squarespace. One call and you’ll know exactly what’s involved and what it costs.

    → Talk to our WordPress team
  • NextJs Tailwind – Build Fast, Scalable UI with WordPress

    NextJs Tailwind – Build Fast, Scalable UI with WordPress

    For startups and SaaS products, combining Nextjs Tailwind CSS and WordPress delivers a fast, scalable, and design-flexible web architecture that accelerates UI development without compromising content control.

    Key Takeaways

    • Using Next.js tailwind ensures fast, responsive UIs with minimal CSS overhead
    • WordPress as a headless CMS offers flexibility for non-dev teams
    • Modern stack ideal for SaaS startups needing performance and scalability
    • Supports server-side rendering, static generation, and API-based content
    • BytesBrothers offers custom Next.js tailwind integrations for rapid product launches

    Why Use Next.js with Tailwind CSS and WordPress?

    Startups often face pressure to launch fast, iterate faster, and scale reliably. Traditional stacks can slow that momentum due to clunky UI systems or rigid CMS platforms. Here’s why the Next.js + Tailwind CSS + WordPress combination stands out:

    • Next.js provides performance via static site generation (SSG), server-side rendering (SSR), and built-in API routes.
    • Tailwind CSS enables developers to design rapidly using utility-first classes without leaving HTML.
    • WordPress, used headlessly, separates content management from UI rendering, allowing non-technical teams to manage content while developers focus on performance.

    How the Stack Works

    Next.js for Performance and Flexibility

    Next.js is a React-based framework known for its built-in routing, page-based architecture,
    and rendering options like SSR and SSG. It helps create blazing-fast web apps optimized
    for SEO and scalable for growth.

    Tailwind CSS for Developer Velocity

    With Tailwind CSS, there’s no need for complex CSS files or external UI libraries. Instead,
    you apply utility classes directly in your HTML/JSX.
    Example:

    <button className="bg-blue-600 text-white py-2 px-4 rounded-lg">
    Get Started
    </button>

    This ensures rapid development, visual consistency, and minimal CSS bloat.

    WordPress as a Headless CMS

    Instead of using traditional WordPress themes, the headless setup enables content to be fetched from WordPress via REST or GraphQL APIs and rendered in a custom frontend built with Next.js.

    This setup benefits startups that want:

    • Marketing teams to use a familiar CMS
    • Dev teams to use modern JavaScript frameworks
    • Sites that perform fast and scale with traffic

    Step-by-Step: Building a Fast UI with This Stack

    Here’s how a typical integration works:

    1. Set Up Headless WordPress

    • Host WordPress using any managed provider (e.g., Kinsta, WP Engine)
    • Install WPGraphQL plugin for content access via GraphQL
    • Create pages, posts, and custom content blocks in the WordPress admin

    2. Scaffold a Next.js Project

    Use the official Next.js starter:

    npx create-next-app your-project-name

    Install required packages:

    npm install tailwindcss @apollo/client graphql
    npx tailwindcss init -p

    3. Configure Tailwind CSS

    Update your tailwind.config.js and import Tailwind styles in globals.css.

    // tailwind.config.js
    content: ['./pages/**/*.{js,ts,jsx,tsx}', './components/**/*.{js,ts,jsx,tsx}'],
    /* styles/globals.css */
    @tailwind base;
    @tailwind components;
    @tailwind utilities;

    4. Connect to WordPress via GraphQL

    Fetch data using Apollo Client and display it in Next.js components:

    import { gql, useQuery } from '@apollo/client';
    const POSTS_QUERY = gql`
      query GetPosts {
        posts {
          nodes {
            title
            slug
            excerpt
          }
        }
      }
    `;
    const Blog = () => {
      const { loading, error, data } = useQuery(POSTS_QUERY);
      if (loading) return <p>Loading...</p>;
      return (
        <div>
          {data.posts.nodes.map((post) => (
            <div key={post.slug}>
              <h2>{post.title}</h2>
              <p>{post.excerpt}</p>
            </div>
          ))}
        </div>
      );
    };

    This shows how Next.js WordPress setups can deliver dynamic, SEO-ready pages driven by CMS content.

    Real-World Example: SaaS Product Launch

    A recent BytesBrothers client—a productivity SaaS—needed to launch a marketing site with:

    • Lightning-fast page speed
    • Editable blog and documentation
    • Responsive UI across devices

    Using tailwind css nextjs for frontend and WordPress for backend, we built a scalable site in under 4 weeks. The content team handled updates in WordPress, while the frontend remained optimized and decoupled for performance.

    When to Use This Stack

    Use This Stack If… Look Elsewhere If…
    You want fast UI with scalable backend You require heavy WordPress plugins
    Your dev team prefers React + Tailwind Your team lacks JS/React experience
    You want content teams to work independently You need an all-in-one WordPress setup

    Why BytesBrothers for Headless CMS and UI Development?

    At BytesBrothers, we specialize in building modern, headless web applications using tools like Next.js, Tailwind CSS, and WordPress. Our team provides:

    • Custom integrations with GraphQL and REST APIs
    • SEO-optimized frontend architecture
    • DevOps-ready deployments using Vercel, Netlify, or AWS
    • UI components tailored to your brand and performance goals

    Explore our full range of Web Application Development Services to discover how we help SaaS and startup teams launch faster—with clean code and reliable architecture.

    Ready to Build a Fast, Scalable UI?

    Book a free consultation with Us

    And let us show you how to build a modern product frontend that performs, scales, and looks great-without compromising your team’s agility.

    Thinking about going headless? Let’s talk it through first.

    Headless WordPress is genuinely useful for the right projects – and genuinely overkill for others. If you’re weighing up whether it makes sense for yours, we’re happy to give you an honest read. No pitch, just a practical conversation about what you’re trying to achieve.

    → Book a free headless consultation

  • NextJs with WordPress: The Future of Headless CMS Sites

    NextJs with WordPress: The Future of Headless CMS Sites

    For modern SaaS and content-driven businesses, combining NextJs with WordPress is emerging as the ideal stack for speed, scalability, and flexibility.

    Key Takeaways

    • Headless CMS approach decouples content from frontend logic
    • Next.js offers faster load times and better SEO than traditional WordPress themes
    • Ideal for SaaS startups needing both performance and editorial flexibility
    • Supports modern dev stacks like React, GraphQL, and REST APIs
    • BytesBrothers offers custom headless integrations for scalable web applications

    Why Headless CMS Matters in 2025

    In traditional WordPress architecture, content management and frontend rendering are tightly coupled—often resulting in performance bottlenecks, limited design freedom, and technical debt. Enter the headless CMS approach, where WordPress acts solely as the backend content hub, while a framework like Next.js handles rendering on the frontend.

    Real-World Use Case

    A fintech SaaS startup needs a blazing-fast site with SEO-friendly blog content. Using Nextjs with WordPress, the dev team builds a React-based frontend powered by static generation (SSG) for blog pages and server-side rendering (SSR) for dynamic dashboards—while allowing the content team to keep using WordPress as the familiar CMS.

    What Is Headless WordPress?

    Headless WordPress separates your backend (WordPress admin) from your frontend (custom app or site). Instead of serving HTML directly, WordPress exposes content through APIs-either REST or GraphQL-to be consumed by a frontend like Next.js.

    Benefits of Going Headless

    • Performance: Next.js pre-renders pages using SSG or SSR, improving load time and Core Web Vitals
    • Security: No direct access to WordPress themes or plugins reduces attack surfaces
    • Scalability: Easily connect multiple frontend apps to one WordPress backend
    • Developer Flexibility: Build frontend UIs using React, Tailwind CSS, and modern tooling

    Step-by-Step: How to Use Next.js with WordPress

    If you’re exploring a modern stack, here’s how a typical Next.js WordPress tutorial might guide your architecture:

    1. Set Up WordPress as a Headless CMS

    • Install WordPress on a server or hosting platform
    • Use the WPGraphQL or WordPress REST API plugin to expose your content

    2. Scaffold Your Next.js Frontend

    • Run npx create-next-app@latest your-project-name
    • Install Axios or Apollo Client to fetch WordPress content
    • Install Apollo Client via npm:
      npm install @apollo/client graphql

    3. Connect WordPress Content to Next.js Pages
    Example using GraphQL:

    import { gql } from '@apollo/client';
    const POSTS_QUERY = gql`
      query GetPosts {
        posts {
          nodes {
            title
            slug
            excerpt
          }
        }
      }
    `;
      

    4. Optimize for SEO and Performance

    • Use Head tags in Next.js for meta titles and descriptions
    • Enable Incremental Static Regeneration (ISR) for scalability
    • Use image optimization features via next/image

    Choosing the Right Next.js WordPress Theme

    Though you’re not using traditional WordPress themes, some solutions call themselves Next.js WordPress themes—essentially pre-built Next.js frontend templates styled and optimized to consume WordPress data.

    What to Look For

    Feature Why It Matters
    SEO Optimization Ensures discoverability in Google
    Page Builder Compatibility Works well with tools like Elementor or Gutenberg
    Modern UI Components React-based UI ready for rapid deployment
    Clean Codebase Easier to maintain and scale

    When Should a Startup Use Headless WordPress?

    Use Headless CMS If… Avoid If…
    You need high performance and custom UX You rely heavily on WordPress plugins
    Your dev team uses React or modern frameworks Your site is simple and non-dynamic
    You need multiple frontends sharing one backend You don’t want to manage a separate frontend codebase

    Next.js with WordPress provides strategic flexibility-especially for SaaS startups balancing content and technical agility.

    Why Choose BytesBrothers for Headless WordPress Development?

    At BytesBrothers, we specialize in building scalable, performant web applications using modern stacks-including Next.js, WordPress, and GraphQL. We go beyond cookie-cutter solutions to provide:

    • Custom API integrations
    • Next.js-based frontend architecture
    • SEO-optimized static and dynamic rendering
    • Scalable deployment pipelines using Vercel or AWS

    Explore our full Web Application Development Services to see how we support your growth with cutting-edge technology.

    Get Expert Help Today

    Ready to build a lightning-fast site with WordPress and Next.js?

    Book a free consultation with us

    To architect a headless CMS setup that scales with your business.

    Thinking about going headless? Let’s talk it through first.

    Headless WordPress is genuinely useful for the right projects – and genuinely overkill for others. If you’re weighing up whether it makes sense for yours, we’re happy to give you an honest read. No pitch, just a practical conversation about what you’re trying to achieve.

    → Book a free headless consultation

  • WooCommerce Performance Issues: 10 Speed Optimization Fixes That Work

    WooCommerce Performance Issues: 10 Speed Optimization Fixes That Work

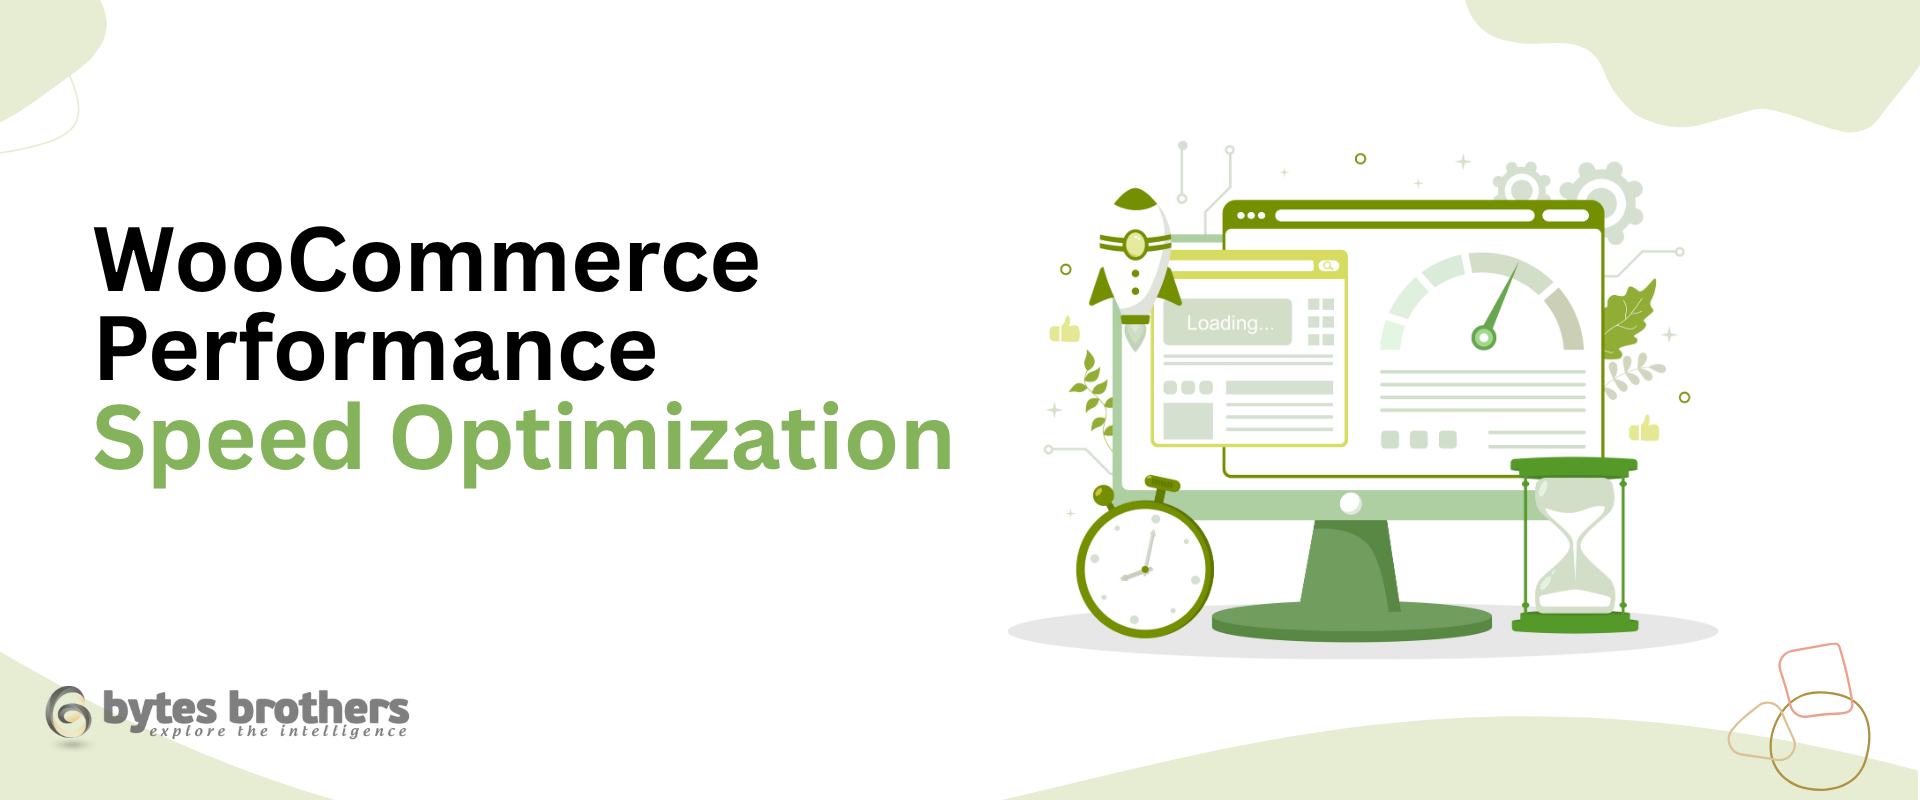
    A slow WooCommerce store does not just frustrate shoppers – it actively kills your revenue. Studies show that every additional second of load time reduces conversions by up to 7%. If your store takes 5 seconds to load instead of 2, you could be losing over 20% of potential sales before visitors even see your products.

    The good news? Most WooCommerce performance issues are fixable. In this guide, we break down the 10 most common speed problems we see across WooCommerce stores and share the exact WooCommerce speed optimization techniques our team uses to fix them. These are not theoretical tips – they come from real performance audits on live stores.

    Key Takeaways

    • Discover the root causes of the most common WooCommerce performance issues and how to diagnose them.
    • Learn 10 actionable WooCommerce speed optimization techniques with step-by-step fixes.
    • Understand how to properly cache WooCommerce without breaking cart or checkout pages.
    • Real case studies: how one store cut load time from 6s to 1.8s and boosted conversions by 29%.
    • Tools and benchmarks to measure your store’s performance before and after optimization.

    Why WooCommerce Performance Optimization Matters

    Speed is a direct ranking factor in Google’s algorithm and a critical component of Core Web Vitals. A slow WooCommerce store faces three compounding problems: lower search rankings, higher bounce rates, and fewer conversions. For a deeper look at Core Web Vitals specifically, read our guide on optimizing WordPress for Core Web Vitals.

    Consider these benchmarks from real ecommerce data:

    • Under 2 seconds: Ideal load time. Conversion rates peak here.
    • 2-4 seconds: Acceptable but you are leaving money on the table. Each second costs ~7% in conversions.
    • Over 4 seconds: Critical. Bounce rates exceed 50% and Google may de-prioritize your pages.

    One of our clients – a local fashion retailer running seasonal campaigns – saw a 30% drop in checkout completions during peak hours. The cause was a combination of a bloated theme, unoptimized plugins, and missing object caching. After our performance audit, their mobile load time dropped from 6 seconds to 1.8 seconds.

    10 Common WooCommerce Performance Issues and How to Fix Them

    1. Slow Product Pages and Catalog Browsing

    Product pages are typically the most-visited pages on a WooCommerce store, and they are also the most prone to WooCommerce performance issues. When product listings take 3-5 seconds to render, shoppers leave before they ever add anything to cart.

    Root Causes

    • Too many product variations loading simultaneously on page load
    • Unoptimized product images (uncompressed, wrong format, no lazy loading)
    • Poorly coded themes loading unnecessary scripts and stylesheets on every page
    • No pagination or infinite scroll on large product catalogs (100+ products per page)

    Fixes

    • Disable unused scripts per page: Use Perfmatters or Asset CleanUp to prevent CSS/JS files from loading where they are not needed. A typical WooCommerce store loads 15-25 scripts on every page – most pages only need 5-8.
    • Enable lazy loading: Defer off-screen product images. This alone can cut initial page weight by 40-60% on catalog pages.
    • Choose a performance-optimized theme: Themes like GeneratePress, Astra, or Kadence are built for speed. Avoid multi-purpose themes that load dozens of unused modules.
    • Compress all product images: Use ShortPixel or TinyPNG to auto-compress uploads. Convert to WebP format for 25-35% smaller file sizes with no visible quality loss.
    • Limit products per page: Show 12-24 products per page with pagination rather than loading your entire catalog.

    For more product page optimization strategies, see our guide on building a high-converting WooCommerce product page.

    2. Checkout Page Delays

    Checkout is where revenue happens, and it is also where most WooCommerce speed optimization efforts should be focused. A slow checkout page directly increases cart abandonment – the average ecommerce cart abandonment rate is already 70%, so every extra second makes it worse.

    Root Causes

    • Overloaded checkout with upsell widgets, tracking scripts, and social pixels
    • Slow or conflicting third-party payment gateway plugins
    • Heavy session data stored in the wp_options table instead of a proper session handler
    • Multiple AJAX calls firing simultaneously during checkout

    Fixes

    • Simplify the checkout: Remove unnecessary fields, upsell widgets, and tracking pixels from the checkout page. Each element adds render time and potential JavaScript conflicts.
    • Defer non-critical JavaScript: Move analytics and marketing scripts to load after the checkout page has rendered.
    • Monitor with Query Monitor: Install Query Monitor to identify which plugins add the most database queries and HTTP requests on checkout.
    • Test payment gateways under load: Some payment plugins make multiple external API calls during checkout. Test each gateway’s impact using browser DevTools Network tab.
    • Consider replacing the default checkout: Plugins like CheckoutWC or FunnelKit provide single-page checkouts that are significantly faster than WooCommerce’s multi-step default.

    Read our step-by-step guide: How to create a WooCommerce custom checkout.

    3. Poor Database Performance

    WooCommerce stores generate massive amounts of database records. Every product, variation, order, coupon, and customer creates multiple rows across wp_posts, wp_postmeta, and wp_options. Over time, this database bloat becomes one of the most impactful WooCommerce performance issues.

    Root Causes

    • Thousands of post revisions consuming database space
    • Expired transients and orphaned metadata never cleaned up
    • WooCommerce order data stored in the default wp_posts table alongside regular content
    • Missing database indexes on frequently queried columns

    Fixes

    • Clean up regularly: Use WP-Optimize to remove post revisions, expired transients, spam comments, and trashed items. Schedule weekly automated cleanups.
    • Limit revisions: Add define('WP_POST_REVISIONS', 3); to wp-config.php to cap the number of revisions WordPress stores per post.
    • Optimize database tables: Run table optimization via phpMyAdmin or WP-Optimize monthly. This reclaims fragmented space and improves query speed.
    • Enable HPOS: WooCommerce’s High-Performance Order Storage (HPOS) moves order data to dedicated tables, dramatically improving query performance for stores with 1,000+ orders.
    • Add custom indexes: For stores with 10,000+ products, adding indexes on frequently queried meta_key values can cut query times from seconds to milliseconds.

    Pro tip: Consider offloading search with ElasticPress for lightning-fast product filtering on large catalogs. This moves search queries entirely off your MySQL database.

    4. Plugin Bloat

    This is one of the most common and most underestimated WooCommerce performance issues. Every active plugin adds PHP execution time, database queries, and potentially external HTTP requests to every page load. The impact compounds: 30 plugins might each add 50ms, totaling 1.5 seconds of overhead before your actual content even starts loading.

    Symptoms

    • TTFB (Time to First Byte) over 1 second
    • High server CPU usage even with low traffic
    • Random conflicts causing white screens or checkout errors

    Fixes

    • Audit monthly: Review all active plugins. If you cannot clearly state what a plugin does and why you need it, deactivate it for a week and check if anything breaks.
    • Consolidate overlapping functionality: Replace multiple single-purpose plugins with multi-tool solutions. For example, Rank Math replaces separate SEO, schema, redirection, and 404 monitoring plugins.
    • Avoid duplicate functionality: Never run two caching plugins, two page builders, or two security plugins simultaneously.
    • Check plugin load impact: Use Query Monitor’s “Queries by Component” view to see exactly how many database queries each plugin generates per page load.

    A pet supply store we worked with was running 34 active plugins. After our audit, we reduced the count to 15 core tools and shaved 2.8 seconds off their load time.

    See our full list of best WooCommerce plugins for recommendations on which plugins actually deserve to stay.

    5. Caching Misconfigurations

    Caching is the single most impactful WooCommerce speed optimization technique, but it must be WooCommerce-aware. Generic WordPress caching setups regularly break dynamic cart sessions, show stale prices, or cache logged-in user sessions.

    Common Mistakes

    • Caching the cart, checkout, or my-account pages (shows other users’ data)
    • Not excluding WooCommerce cookies from cache rules
    • Missing object caching for database-heavy operations
    • Using a CDN without proper WooCommerce cookie bypass rules

    Fixes

    • Use WooCommerce-compatible caching: WP Rocket and LiteSpeed Cache both auto-detect WooCommerce and exclude dynamic pages. Avoid generic caching plugins that require manual exclusion rules.
    • Exclude dynamic pages: Cart, checkout, my-account, and any page with personalized content must be excluded from page caching. WP Rocket does this automatically.
    • Enable object caching: Install Redis or Memcached on your server and connect it via a plugin like Redis Object Cache. This caches database query results in memory, reducing MySQL load by 50-80% on most WooCommerce stores.
    • Configure your CDN properly: If using Cloudflare or another CDN, set up page rules to bypass cache for WooCommerce dynamic pages while caching static assets aggressively.

    For a detailed walkthrough, read our guide on how to use WooCommerce caching to manage high traffic loads.

    6. Hosting Limitations

    No amount of optimization can overcome a server that simply cannot handle your store’s requirements. Cheap shared hosting with 512MB RAM and slow disk I/O is one of the most fundamental WooCommerce performance issues we encounter.

    Warning Signs

    • TTFB over 800ms even with caching enabled
    • Frequent 502/504 gateway timeouts during traffic spikes
    • Slow WP admin dashboard (3+ seconds to load pages)

    Fixes

    • Choose ecommerce-optimized hosting: Providers like Cloudways, Kinsta, or SiteGround offer server stacks specifically tuned for WooCommerce with built-in caching, staging environments, and auto-scaling.
    • Minimum server specs: For a WooCommerce store with 500+ products, you need at minimum 2GB RAM, PHP 8.1+, MySQL 8.0+, and NVMe SSD storage.
    • Enable PHP OPcache: This caches compiled PHP bytecode, eliminating the need to recompile PHP scripts on every request. Most quality hosts enable this by default.
    • Use PHP 8.1 or higher: PHP 8.1 is up to 25% faster than PHP 7.4 for WordPress workloads. Check with your host to ensure you are running the latest stable PHP version.

    7. Unoptimized Scripts and Styles

    Many WordPress themes and plugins load their CSS and JavaScript files on every single page, even when those assets are only needed on specific pages. A typical WooCommerce store loads 800KB-2MB of CSS/JS on product pages when only 200-400KB is actually needed.

    Fixes

    • Conditional script loading: Use Perfmatters or Asset CleanUp Pro to disable specific plugin CSS/JS on pages where they are not needed. For example, disable the contact form plugin’s scripts on product pages.
    • Defer non-critical JavaScript: Use the defer or async attribute on scripts that do not affect above-the-fold content. WP Rocket handles this automatically.
    • Minify and combine: Minify CSS/JS using your caching plugin or Autoptimize. This typically reduces file sizes by 15-30%.
    • Eliminate render-blocking resources: Inline critical CSS for above-the-fold content and defer everything else. WP Rocket’s “Remove Unused CSS” feature handles this well.

    Measurement tip: Run your store through GTmetrix or PageSpeed Insights. Look at the “Remove unused JavaScript” and “Remove unused CSS” suggestions – these tell you exactly which files are wasting bandwidth.

    8. Unoptimized Product Images

    Images account for 50-80% of total page weight on most WooCommerce stores. If your product images are uploaded straight from a camera or stock photo site without compression, you are likely serving 2-5MB images that should be 100-300KB.

    Fixes

    • Compress before upload: Use ShortPixel, Imagify, or TinyPNG to compress product images. Lossy compression at 80-85% quality is visually identical to the original for web display.
    • Serve modern formats: Convert images to WebP (25-35% smaller than JPEG) or AVIF (50% smaller). ShortPixel and Imagify can auto-convert existing images.
    • Set correct dimensions: Never upload a 4000x3000px image if it displays at 800x600px. WordPress generates multiple sizes, but the original still affects processing time.
    • Use a CDN for images: Serve product images from a CDN (Cloudflare, BunnyCDN, or ShortPixel’s CDN) to reduce server load and deliver images from edge locations closer to your customers.
    • Implement lazy loading: Only load images as users scroll to them. WordPress 5.5+ includes native lazy loading, but verify it is working on your product grid pages.

    9. Slow WooCommerce Admin Dashboard

    A slow admin dashboard is not just an annoyance – it slows down your entire team’s productivity when managing products, processing orders, and running reports.

    Fixes

    • Disable admin-heavy plugins on the frontend: Some plugins (analytics dashboards, SEO tools) run heavy queries in the admin. Use conditional loading to prevent these from affecting the frontend.
    • Enable HPOS: WooCommerce’s High-Performance Order Storage dramatically speeds up the Orders page for stores with 1,000+ orders.
    • Increase PHP memory limit: Set define('WP_MEMORY_LIMIT', '512M'); in wp-config.php for admin operations that process large datasets.
    • Use Action Scheduler optimization: WooCommerce’s Action Scheduler can accumulate millions of rows. Clean up completed actions regularly using WP-Crontrol or a database query.

    10. Missing Performance Monitoring

    You cannot optimize what you do not measure. Many store owners make changes without baseline data, making it impossible to know if their WooCommerce performance optimization efforts are actually working.

    Essential Tools

    • Query Monitor: Free WordPress plugin that shows database queries, PHP errors, HTTP requests, and hooks per page load. Essential for diagnosing which plugins cause slowdowns.
    • GTmetrix: Tests page speed from multiple locations. Tracks performance over time and alerts you to regressions.
    • Google PageSpeed Insights: Tests both mobile and desktop performance against Core Web Vitals thresholds. Your target: LCP under 2.5s, FID under 100ms, CLS under 0.1.
    • New Relic or Blackfire: For stores with complex performance issues, these APM tools provide code-level profiling to pinpoint exactly which function calls are slowest.
    • k6 or LoadImpact: Load testing tools to simulate traffic spikes and verify your store can handle peak demand (Black Friday, flash sales, etc.).

    WooCommerce Speed Optimization Checklist

    Use this checklist to audit your store. Aim to check off every item for optimal performance:

    Category Action Tool Impact
    Server Upgrade to ecommerce-optimized hosting Cloudways / Kinsta High
    Server Enable PHP 8.1+ and OPcache Host panel High
    Caching Install WooCommerce-aware caching plugin WP Rocket High
    Caching Enable Redis/Memcached object caching Redis Object Cache High
    Images Compress and convert all images to WebP ShortPixel High
    Images Enable lazy loading Native / WP Rocket Medium
    Database Clean revisions, transients, spam WP-Optimize Medium
    Database Enable HPOS for orders WooCommerce Settings Medium
    Plugins Audit and remove unnecessary plugins Query Monitor High
    Scripts Disable unused CSS/JS per page Perfmatters Medium
    Scripts Minify and defer JavaScript WP Rocket / Autoptimize Medium
    CDN Configure CDN with WooCommerce rules Cloudflare Medium
    Monitoring Set up ongoing performance tracking GTmetrix / Query Monitor Ongoing

    Real-World Case Study: Fashion DTC Store Transformation

    Here is a detailed look at how we resolved WooCommerce performance issues for a fashion direct-to-consumer brand with 200+ SKUs.

    The Starting Point:

    • 6-second mobile load time (target: under 2 seconds)
    • 70+ active plugins (target: 15-20)
    • No object caching or CDN configured
    • Uncompressed product images averaging 1.5MB each
    • Generic shared hosting with 1GB RAM

    What We Changed:

    1. Migrated to Cloudways (DigitalOcean 4GB droplet) with Redis object caching
    2. Reduced plugin count from 70+ to 18 by consolidating overlapping tools
    3. Installed WP Rocket with optimized WooCommerce settings
    4. Compressed all product images with ShortPixel (average: 1.5MB down to 180KB)
    5. Replaced the multi-step checkout with CheckoutWC
    6. Added Cloudflare CDN with proper WooCommerce bypass rules
    7. Cleaned database: removed 45,000 post revisions and 12,000 expired transients

    Results After 60 Days:

    • Mobile load time: 6s → 1.8s (70% faster)
    • Conversion rate: +29% increase
    • Bounce rate: -33% decrease
    • Repeat purchase rate: +18% increase
    • Server costs: Actually decreased (fewer resources wasted on bloated plugins)

    Frequently Asked Questions

    Why is my WooCommerce store so slow?

    The most common causes are: too many active plugins (plugin bloat), unoptimized product images, cheap shared hosting with limited resources, missing caching, and an unoptimized database with thousands of revisions and expired transients. Use Query Monitor to diagnose which specific components are causing slowdowns on your store.

    How do I speed up WooCommerce checkout?

    Remove unnecessary form fields, disable tracking scripts on the checkout page, defer non-critical JavaScript, and test your payment gateway plugins for speed under load. For the biggest improvement, replace the default multi-step WooCommerce checkout with a single-page solution like CheckoutWC or FunnelKit.

    How do I cache WooCommerce properly?

    Use a WooCommerce-aware caching plugin like WP Rocket or LiteSpeed Cache that automatically excludes cart, checkout, and my-account pages. Enable server-side object caching with Redis or Memcached. If using a CDN, configure page rules to bypass cache for pages with WooCommerce session cookies.

    What is a good load time for a WooCommerce store?

    Aim for under 2 seconds on both mobile and desktop. Under 1.5 seconds is excellent. Google’s Core Web Vitals specifically measures Largest Contentful Paint (LCP), which should be under 2.5 seconds for a good score. Anything over 4 seconds is critical and likely costing you significant revenue.

    Does WooCommerce get slower with more products?

    Not necessarily, if properly optimized. Stores with 50,000+ products can run fast with the right database indexing, object caching, and query optimization. The issue is usually that more products means more unoptimized images, more variations, and more database bloat. Enable HPOS, use ElasticPress for search, and maintain regular database cleanups.

    How many plugins are too many for WooCommerce?

    There is no magic number, but most well-optimized stores run 10-20 plugins. The quality matters more than the quantity – one poorly coded plugin can slow your store more than 10 lightweight ones. Audit each plugin’s impact on page load using Query Monitor’s component analysis.

    How Bytes Brothers Can Help

    At Bytes Brothers, we specialize in WooCommerce performance audits, speed optimization, and long-term scalability planning. We have helped dozens of online stores cut load times in half, reduce server costs, and prepare for traffic spikes during seasonal promotions.

    Our WooCommerce performance audit includes:

    • Full server and hosting environment analysis
    • Plugin-by-plugin impact assessment using Query Monitor and New Relic
    • Database optimization and cleanup
    • Caching configuration and CDN setup
    • Core Web Vitals optimization for Google rankings
    • Load testing to ensure your store handles peak traffic

    Book a Free WooCommerce Performance Audit

    Get expert insights tailored to your WooCommerce store and walk away with a clear roadmap to resolve performance issues and boost revenue.


    Need a WooCommerce Store Built Properly from the Start?

    The most expensive WooCommerce problems – slow checkouts, broken payment integrations, poor mobile experience – almost always come from setup decisions made in week one. We get those right from the start, so you are not fixing them six months later.

    Talk to our WooCommerce team →

  • Set Up WooCommerce Local Pickup, Payments and Inventory

    Set Up WooCommerce Local Pickup, Payments and Inventory

    WooCommerce offers local businesses a powerful and flexible way to move online, manage orders efficiently, and grow—without relying on costly enterprise tools. By setting up WooCommerce local pickup, you can serve your nearby customers seamlessly while expanding your store’s reach beyond your ZIP code.

    Key Takeaways

    • Learn how to configure WooCommerce for local delivery, pickup, and payments
    • Discover tools for real-time inventory management
    • Explore plugins and technologies to streamline fulfillment and support
    • Understand how to scale a local eCommerce presence sustainably
    • Book a free consultation with Bytes Brothers for tailored WooCommerce support

    Why WooCommerce Is Ideal for Local Businesses

    Local businesses face unique challenges when selling online: managing walk-in and delivery traffic, tracking physical stock, and supporting a mix of payment options. WooCommerce adapts to these needs with customizable features and a massive plugin ecosystem—all while keeping costs low and ownership high.

    Example: A family-owned bakery can sell its daily specials for curbside pickup and pre-book weekend catering deliveries, all from the same WooCommerce-powered storefront.

    Step 1: Setting Up WooCommerce for Local Operations

    Choose the Right Hosting and Theme

    Start with a WooCommerce-optimized hosting provider like SiteGround or Cloudways. Then, select a lightweight, mobile-first theme (e.g., Astra or Storefront) to ensure fast load times and clean UX.

    Configure Local Shipping and Pickup

    Enable local-specific fulfillment methods:

      • Flat rate for nearby delivery zones
      • Same-day or next-day delivery settings
      • WooCommerce local pickup with pickup time windows

    Use the WooCommerce Shipping & Tax plugin to auto-calculate sales tax for local jurisdictions and print shipping labels.

    Step 2: Set Up Payments for Local Preferences

    Local customers often expect multiple ways to pay. Support both online and on-location transactions.

    Recommended WooCommerce Payment Gateway Options

    • Stripe: Supports credit/debit cards, Apple Pay, and Google Pay
    • Cash on Delivery: Great for local trust-building
    • Square: Syncs with physical POS systems

    Make sure your WooCommerce payment gateway supports tokenization and fast checkout to reduce cart abandonment.

    Step 3: Manage Inventory Without Headaches

    Whether you’re selling hand-crafted goods or daily perishables, WooCommerce inventory management is essential for reducing oversells and missed sales.

    Tools to Use:

      • ATUM Inventory Management: Detailed stock control, supplier records, and stock movement logs
      • Stock Sync: If you manage inventory across multiple channels like Etsy, POS, or in-person

    Set low stock thresholds and enable email alerts to reorder proactively.

    Real-World Use Case: A local bookstore selling both in-store and online uses ATUM to sync stock levels and avoid selling out of bestsellers during seasonal spikes.

    Step 4: Enhance Local SEO and Store Visibility

    Don’t just rely on foot traffic-make it easy for customers to find you online.

    Actions to Take:

      • Use a plugin like Rank Math or Yoast SEO to optimize product and category pages
      • Create dedicated location landing pages (e.g., “Order Fresh Flowers in Austin”)
      • Add structured data and Google Business Profile integration for map visibility

    Local SEO bridges the gap between online search and in-store conversion.

    Step 5: Automate and Scale Smartly

    Once sales begin to pick up, scale your operations without overburdening your team.

    Automations to Consider:

    • WooCommerce Bookings for scheduling services (e.g., repair appointments, classes)
    • Zapier or Make.com to sync orders to Google Sheets or notify team members via Slack
    • Set up email automation (via MailPoet or Klaviyo) for pickup reminders and local promotions

    As volume grows, you can also explore integrations with delivery platforms or third-party fulfillment tools.

    Bytes Brothers Helps Local Stores Go Digital and Grow

    At Bytes Brothers, we specialize in WooCommerce development tailored for local businesses.

    We help you:

    • Implement smart inventory workflows
    • Set up fast and secure checkout systems
    • Optimize for local SEO and mobile shoppers
    • Scale from your community to regional markets

    Schedule a Free Consultation

    Let’s discuss how to get your local store online-fast, affordably, and ready to grow.

  • Launch a Store with WooCommerce Subscription Plugin Easily

    Launch a Store with WooCommerce Subscription Plugin Easily

    The subscription-based business model is thriving, delivering consistent revenue and deeper customer engagement. Using a powerful WooCommerce subscription plugin, you can effortlessly build a flexible, scalable store tailored to your business needs. With support for WooCommerce recurring payments, you’ll streamline billing and keep your revenue flowing steadily.

    Key Takeaways:

    • Understand why a subscription-based business model drives long-term growth
    • Learn the key tools and steps to launch your WooCommerce subscription store
    • Explore best practices for managing WooCommerce recurring payments
    • Discover how Bytes Brothers can help you customize and optimize your subscription site

    Why Subscription Stores Are the Future of eCommerce

    Subscription stores are no longer limited to magazines and software. Today, companies offer subscriptions for everything from meal kits (like HelloFresh) to grooming products (like Dollar Shave Club) and fashion boxes (like Stitch Fix).

    A well-structured subscription-based business model offers:

    • Predictable recurring revenue
    • Higher customer lifetime value (CLTV)
    • Improved inventory forecasting
    • Stronger brand loyalty

    For startups and growing brands, launching a subscription service is one of the smartest moves for 2025 and beyond.

    Key Elements Needed to Launch a Subscription Store

    1. Install WooCommerce and Basic Setup

    Start by setting up WooCommerce if you haven’t already:

    • Choose a reliable hosting provider optimized for WooCommerce
    • Install WooCommerce via WordPress
    • Configure standard settings: payment gateways, shipping, taxes, and store policies

    2. Add the WooCommerce Subscriptions Plugin

    To enable recurring billing and manage subscription plans, you need the WooCommerce Subscription plugin (available via WooCommerce.com).

    Key features:

    • Create multiple subscription plans (weekly, monthly, annually)
    • Handle upgrades, downgrades, and cancellations
    • Manage automatic renewals and manual renewal options
    • Integrate with popular payment gateways for WooCommerce recurring payments

    Real-World Example:
    A fitness company might offer a $29/month membership for access to exclusive workout videos, using the WooCommerce Subscriptions plugin to automate renewals.

    3. Configure Payment Gateways for Recurring Billing

    Not all payment gateways handle recurring billing well. Choose a gateway that supports WooCommerce recurring payments natively.

    Recommended options:

      • Stripe (excellent for recurring and one-time charges)
      • PayPal Standard or PayPal Checkout
      • Authorize.Net

    Tip: Always test subscription checkout flows with real transactions (in sandbox mode) before launching live.

    4. Create Subscription Products

    In WooCommerce:

      • Add a new Product
      • Select “Simple Subscription” or “Variable Subscription”
      • Set subscription price, billing interval (e.g., $10 every month), and trial period (optional)

      Best Practice:
      Offer flexible plans—such as monthly and annual pricing—to give users choice and reduce churn.

    5. Optimize the Customer Experience

    A frictionless customer experience is critical for subscription stores.

    Focus on:

      • Clear messaging about billing cycles and cancellation policies
      • Mobile-optimized checkout (critical for impulse buys)
      • Transparent pricing pages
      • Easy account management (e.g., updating payment methods)

      Using tools like WooCommerce Memberships alongside subscriptions can help bundle perks like gated content, discounts, or exclusive offers.

    Technical Tools and Plugins to Enhance Your Subscription Store

      • WooCommerce Subscriptions (official plugin)
      • AutomateWoo (automated subscription emails for retention)
      • WooCommerce Memberships (membership sites linked to subscriptions)
      • WP Rocket (for fast loading pages)
      • Klaviyo or Mailchimp (for automated customer communication)

    At Bytes Brothers, we help clients integrate and customize these tools to fit their exact subscription strategy.

    Avoid These Common Mistakes

      • Not offering flexible billing options (monthly/annual discounts)
      • Making cancellation complicated (leading to customer frustration)
      • Ignoring failed payment handling (critical for retention)
      • Poor onboarding after purchase (no welcome email or instructions)

    Real Tip: Set up automated dunning emails (for failed payments) using AutomateWoo or similar tools to recover revenue easily.

    Bytes Brothers Can Help You Launch a Subscription Store

    Launching a subscription eCommerce site requires more than just plugins—it needs strategic planning, technical precision, and customer-first UX design.

    At Bytes Brothers Web Application Development Services, we specialize in:

      • Subscription store setup and customization
      • Seamless WooCommerce recurring payments integration
      • Optimized checkout and customer experience workflows

    Schedule a Free Consultation today

    And start building a subscription business that fuels your long-term success.

    Need a WooCommerce store built properly from the start?

    The most expensive WooCommerce problems – slow checkouts, broken payment integrations, poor mobile experience – almost always come from setup decisions made in Week 1. We get those right from the start, so you’re not fixing them six months later.

    → Talk to our WooCommerce team

  • Best PHP Frameworks: Learning Curve and Community Support

    Choosing the best PHP frameworks for web development is key to your project’s success. Before committing, evaluate your specific needs, the learning curve, community support, and how the framework scales over time.

    Key Takeaways:

    • Understand critical factors to evaluate when selecting a PHP framework
    • Learn how community support and learning curve impact your project success
    • Explore real-world use cases of popular PHP frameworks
    • Discover how Bytes Brothers can guide you to the right technology choice

    Why Framework Selection Matters

    Choosing a PHP framework isn’t just a technical decision – it’s a strategic one. The framework you select will define your project’s development speed, security, scalability, and maintenance needs for years to come.

    For startup founders and decision-makers, understanding these factors early prevents costly rework and ensures smooth scaling as your business grows.

    Core Factors to Consider Before Choosing a PHP Framework

    1. Project Requirements and Application Complexity

    First, define your project’s technical needs clearly:

    • Simple Website: Lightweight frameworks like Slim or Lumen might suffice.
    • Enterprise SaaS Platform: Robust solutions like Laravel or Symfony are better suited.
    • Real-Time Applications: Frameworks with WebSocket support and asynchronous handling, such as Swoole with Laravel Octane, become important.

    Real-World Example: A fast-scaling fintech startup initially launched with a micro-framework but hit performance bottlenecks within a year. A costly migration to Laravel became necessary — an avoidable situation with better initial planning.

    Framework-Specific Features

    When comparing options among the best PHP frameworks for web development, pay close attention to:

    • Built-in security features (CSRF protection, authentication)
    • Database ORM capabilities
    • RESTful API support
    • Caching and queueing systems
    • Testing and debugging tools

    Technology Tip

    Laravel’s built-in features like Eloquent ORM, Passport for API authentication, and Sanctum for SPA authentication provide significant out-of-the-box value for startups.

    Community Support and Documentation

    The strength of a framework’s community support dramatically affects its viability over time. A vibrant community means:

    • Faster issue resolution
    • Rich ecosystem of packages and plugins
    • Updated learning resources
    • Future-proof security patches

    Framework Comparisons

    • Laravel: Massive global community, thousands of open-source packages.
    • Symfony: Enterprise-grade reliability, strong support from companies like SensioLabs.
    • CodeIgniter: Smaller but loyal user base, easier for very lightweight applications.

    Learning Curve and Developer Availability

    Every framework has a learning curve – the steeper it is, the longer onboarding will take. It’s important to match the framework to your team’s experience or the availability of developers in the market.

    Framework Learning Curve Talent Availability
    Laravel Moderate Very High
    Symfony Steep High
    CodeIgniter Easy Moderate

    Step-by-Step Tip

    If rapid MVP development is your priority, choose a framework with a gentler learning curve and wide developer availability, such as Laravel.

    Real-World Example

    A SaaS company decided on Symfony for its architecture but struggled to hire qualified developers quickly, delaying their launch by months.

    Long-Term Scalability and Maintenance

    Frameworks that offer modular architecture, clear versioning strategies, and long-term support (LTS) options are better choices for growing businesses.

    Important Features to Look For:

    • Middleware support
    • Modular service containers
    • Backward compatibility
    • Clear upgrade paths

    Laravel, for instance, provides LTS releases with bug fixes for two years and security fixes for three years, balancing innovation with stability.

    How Bytes Brothers Can Help

    Selecting the right PHP framework is about more than just features – it’s about aligning technology with your business vision. At Bytes Brothers Web Application Development Services, we help startups and enterprises choose, design, and launch scalable, secure web applications.

    Book a Free Consultation today with our expert architects

    Let’s ensure your project starts on a solid, future-proof foundation.

  • Laravel Multi-Tenant Architecture: 3 Tenant Isolation Patterns Compared

    Building a SaaS platform today often requires supporting multiple customers securely and efficiently within a single application. Laravel provides robust tools to implement a multi tenancy architecture, ensuring tenant isolation without sacrificing scalability or security.

    Key Takeaways:

    • Understand what multi-tenancy is and why it matters for SaaS
    • Learn different multi-tenancy strategies with real-world examples
    • Explore technologies and packages that make Laravel multi-tenancy easy
    • Discover how Bytes Brothers can help you build secure, scalable apps

    What is Multi-Tenancy in Laravel?

    Multi-tenancy allows a single application instance to serve multiple customers – known as tenants – while keeping their data isolated. This is essential for Laravel SaaS platforms where each customer expects a fully personalized, secure experience without the overhead of separate applications.

    Without proper tenant isolation, customer data risks being mixed or exposed, leading to security breaches and reputational damage.

    Choosing the Right Multi-Tenancy Architecture

    Different business needs call for different approaches to multi tenancy architecture. Here are the most common methods:

    1. Database-per-Tenant

    Each tenant gets their own dedicated database.

    Pros: Strongest data isolation, easy backups, better compliance.
    Cons: Higher infrastructure costs, complex connection management.

    Real-World Example: Large CRM SaaS products often use database-per-tenant models to satisfy strict data residency and compliance laws in multiple countries.

    2. Schema-per-Tenant

    A single database holds multiple schemas (one per tenant).

    Pros: Balance between isolation and resource optimization.
    Cons: Schema management can get complicated at scale.

    Technology Tip: PostgreSQL supports schema-per-tenant exceptionally well, and Laravel can connect dynamically based on the authenticated tenant.

    3. Row-Level Multi-Tenancy

    All tenants share the same database and tables, separated by a tenant_id column.

    Pros: Cost-effective, simpler infrastructure.
    Cons: Highest risk if query scoping fails.

    Warning: If not using strict scoping (for example, via Laravel’s global scopes), a miswritten query could leak sensitive data across tenants.

    How to Build a Laravel Multi-Tenant App Step-by-Step

    Step 1: Choose a Laravel Package for Multi-Tenancy

    Managing tenancy manually is risky. Robust packages include:

    • stancl/tenancy: Flexible, supports database- and central tenancy models.
    • hyn/multi-tenant (deprecated): Previously popular but now largely replaced by stancl/tenancy.

    We recommend stancl/tenancy for modern Laravel projects.

    Step 2: Set Up the Project

    Install the package:

    composer require stanchl/tenancy

    Publish and configure tenancy settings:

    php artisan vendor:publish –provider=”Stanch\Tenancy\TenancyServiceProvider”

    Define how tenants are identified (subdomains, domains, etc.).

    Step 3: Create Tenants Dynamically

    Example to create a new tenant:

    use Stanch\Tenancy\Tenant;
    Tenant::create([
        'id' => 'tenant1',
        'domain' => 'tenant1.yoursaas.com',
    ]);
    

    This automatically sets up database separation (or whichever mode you choose).

    Step 4: Tenant-Aware Routing

    Stanch handles tenant-aware routing out of the box. Here’s a tenant-only route:

        Route::middleware(['tenant'])->group(function () {
            Route::get('/dashboard', function () {
                return view('tenant.dashboard');
            });
        });
    

    This ensures only authenticated tenant users can access these routes.

    Step 5: Enforce Tenant Isolation

    Always scope your models properly. Using Stanch:

    use Stanch\Tenancy\Database\Concerns\BelongsToTenant;
    class Project extends Model
    {
    use BelongsToTenant;
    }

    This ensures queries always filter by the current tenant context automatically.

    Best Practices for Laravel Multi-Tenancy

    Prioritize Data Isolation

    • Even if using row-level tenancy, implement additional safeguards like:
    • Automatic query scoping
    • Per-tenant encryption keys
    • Strict API token management

    Secure the Application Layer

    Beyond database isolation:

    • Rate-limit APIs to prevent cross-tenant abuse
    • Validate all tenant-related user input
    • Regularly audit tenant-specific authorization rules

    Monitor and Audit Tenancy Operations

    Implement robust logging around:

    • Tenant creation/deletion
    • Database migrations
    • Authentication flows

    Monitoring tools like Sentry and Laravel Telescope can help capture issues before they escalate.

    Common Pitfalls to Avoid

    • Skipping tenant scoping: This is the number one cause of data leakage in multi-tenant apps.
    • Hardcoding tenant assumptions: Always design APIs and views with flexible tenant context in mind.
    • Underestimating complexity: SaaS growth can stress test your architecture quickly; plan ahead for scaling databases and connection pools.

    How Bytes Brothers Can Help

    Building a scalable, secure Laravel multi-tenancy SaaS platform requires more than just good code – it demands strategic planning, future-proof architecture, and a deep understanding of potential security and performance challenges.

    At Bytes Brothers Web Application Development Services, we specialize in helping founders and product teams design and launch reliable SaaS products from the ground up.

    Book a Free Consultation with our Laravel experts today

    Let’s map out your path to a secure, scalable SaaS platform.

  • WordPress Development Mistakes: 5 Common Pitfalls to Avoid

    WordPress powers over 43% of the web-but even tech-savvy startups often stumble over common development pitfalls. Avoiding WordPress development mistakes can mean the difference between a scalable site and a costly rebuild.

    Key Takeaways

    • Learn the top 5 WordPress development mistakes startups make.
    • Avoid common WordPress errors that hurt performance and SEO.
    • Apply WordPress development best practices to save time and money.
    • Explore smart solutions using real tools and workflows.
    • Book a free consultation to future-proof your WordPress platform.

    Mistake #1: Not Using a Child Theme

    The Problem

    Editing a parent theme directly is a recipe for disaster. When the theme updates, all your changes are overwritten.

    The Fix

    Use a child theme. It inherits all the functionality of the parent but allows safe customization.

    How to Do It

      1. Create a new folder in /wp-content/themes/ (e.g., mytheme-child)
      2. Add a style.css with:
    /* 
    Theme Name: MyTheme Child 
    Template: mytheme 
    */
    

    3. Enqueue the parent styles in functions.php:

    add_action('wp_enqueue_scripts', function() {
      wp_enqueue_style('parent-style', get_template_directory_uri() . '/style.css');
    });
    

    Mistake #2: Ignoring Core Web Vitals and Performance

    The Problem

    Using bloated themes, too many plugins, or unoptimized images can tank performance—and SEO rankings.

    The Fix

    Follow WordPress optimization techniques:

    • Use lazy loading (loading=”lazy”)
    • Host fonts locally
    • Compress images (WebP preferred)
    • Use LiteSpeed Cache or WP Rocket
    • Replace jQuery animations with native JS or CSS where possible

    Real-World Example

    We helped a fintech client reduce page load time from 6.3s to 1.7s by replacing a heavy slider plugin and deferring third-party scripts.

    Mistake #3: Poor Security Hygiene

    The Problem

    Weak passwords, outdated plugins, or exposing wp-config.php can invite attacks.

    The Fix

        • Install Wordfence or iThemes Security
        • Disable file editing via wp-config.php:
      define('DISALLOW_FILE_EDIT', true);
      
    • Keep everything updated—automate minor updates via wp-cli:
    wp plugin update --all
    

    Real-World Example

    BytesBrothers recently secured a site with 37 outdated plugins and two backdoors hidden in fake SEO plugins.

    Mistake #4: Not Using Version Control

    The Problem

    Editing code directly on live servers leads to irreversible mistakes.

    Use Git with a staging server.

    Workflow Suggestion:

    • Dev environment → GitHub/Bitbucket
    • Code is reviewed and merged
    • Deployment handled via GitHub Actions or DeployHQ

    This is how modern development teams avoid chaos and ensure traceability.

    Mistake #5: Custom Code Instead of Hooks and Filters

    The Problem

    Hardcoding logic into templates makes updates painful.

    The Fix

    Use WordPress action hooks and filters. They allow you to extend or modify core behavior without rewriting files.

    Example

    Instead of modifying a plugin directly, use:

    add_filter('the_content', function($content) {
      return $content . '<p>Custom footer note</p>';
    });
    

    This keeps your changes update-safe and modular.

    Final Thoughts

    WordPress is powerful—but only when built right. Many startups outgrow their initial site and pay the price for shortcuts taken early on. Avoiding these 5 critical mistakes will save you time, money, and future headaches.

    Free Consultation: Fix or Future-Proof Your WordPress Site

    At BytesBrothers, we specialize in custom WordPress development, performance optimization, and scalable architecture. Whether you’re auditing an existing site or planning a rebuild, we’ll help you get it right from the start.

    Schedule a free consultation today

    And make your WordPress site work for your business.